Aug 17, 2011

I'm Creepin

So, I've moved halfway across the country but was browsing PHX craigslist and ran across the old beast. Sad enough, she was for sale as a shell  :(  I gotta admit, it made me a little sick to my stomach to hear that the car was being parted out. Sad day indeed...

It looks like the new owner put s5 tails, and an s5 front bumper on her...  Not a fan at all. Although, i love that Odula lip!!

The ad says that the front rotor has two blo.... well, here, I'll just copy it in.


Perfect Mazda Rx-7 Shell/Parting - $2700 (Mesa)


Date: 2011-08-15, 4:42PM MST
Reply to: XXXXXXXXXXX

I want 2700 OBO for the body as she sits with the new tires and gorgeous S5 BBS wheels, lights, interior etc etc etc is all included except the motor.
I have the CLEAN AZ TITLE IN HAND!


I'm also parting the 380whp motor SEPARATELY. Has two blown apex seals on the front rotor.
MAKE OFFERS on these parts please.
The turbo and MoTec are worth quite a bit I'll take 1k each though.
T04 turbo. DevilsOwn methanol injection kit, MoTec tuneable computer with software included, custom exhaust, intercooler MSD ignition etc etc etc.
Less than 10k miles on the turbo build.
Email is preferred but feel free to text/call be sure to leave a voice-mail.. XXXXXXXXX


Apr 19, 2010

13.2 @ 113 mph

Here is a video from SpeedWorld in Phoenix. I ran a 13.2 with a 2.2 60 ft at 113 mph. I couldn't get great traction with 8" wheels, and I was squatting really bad when shifting into 2nd. I broke my diff mount during one of these runs.

Drag from Nick Pitcavage on Vimeo.

Mar 21, 2010

The End of an Era


I sold the RX-7. I was hoping this day would never come, but it was a for a worthy cause. These are the last pics I have of her before I sold her.

Thanks for following along. This has been the most fun car I've ever driven or owned.
I'm not sure I can ever build another rotary, but one thing is sure; I will be back building something soon.

Sep 19, 2009

400 HP Here I Come!!

I've been a little quiet lately, but there have been some major changes on the 7. First of all, I installed an Isuzu NPR front mount intercooler. This isn't one of those, "sticks out of the front bumper with chrome everywhere" types of intercoolers. This specific intercooler is a Garrett core, and fits in front of the stock radiator on a 2nd gen RX-7. It actually fits in there so well, that it could pass as a stock piece. It's pretty sleeper!


It didn't look so hot when it first arrived. I mean, it was ok, but there was a lot of corrosion on the front fins, and they were pretty bent up. I cleaned it up with some solvent, break cleaner, and needle nose pliers. I tired to straighten most of the fins, but it's painstaking.


Turblown, once again, did an excellent job on the install. It looks really clean, and functions perfectly. I was really trying to keep the AC condenser, but for now, it got cut... I am dead set on having AC in this car, so one way or another, I will find a way to get a condenser back on the car.

We've been out tuning quite a bit lately. Trying different things, and I was having some issues with two mods in particular. The Wastegate and the Blow Off Valve. I'm not really sure what was going on there, but once I tried adding an Electronic Boost Controller, those two things started acting up. Turns out my old-school HKS sequential bov is leaking pretty good now, and my wastegate was somehow getting jammed. I replaced the wastegate and went up in spring size; from a 9psi spring, to a 18psi spring!!! I un-installed the Boost Controller out of suspicion that is doesn't work and am just sticking with the wastegate for now.

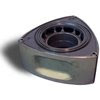
Recently, Turblown started getting these really sexy looking heat shields. It looks so sweet under the hood, I had to grab one. He even makes them for a 3-Rotor... Not that I want anything to do with one of those money pits!! HaHaHa!


We went out tuning and it was scary fun. 18psi with lower than ambient intake temps really makes the car move. It was hitting 18 psi by about 5k RPMs. Then a little problem arrived, the spark was breaking up at high RPM. Those 20 year old coils just couldn't handle the power. Today, Turblown just finished installing a couple of MSD Blaster 2 coils and the car is ready for a little tuning once again.


I still haven't fixed the leaky BOV, looks likes I'll have to shop for a new one...

Aug 4, 2009

AC Wire Bypass

Well what the heck is the point of having a new AC compressor, new rubber lines and new o-rings if you can't turn your AC on!? I am getting tired of being so close to having AC in this car so I decided to make a strong push to get it going. The problem I am having is that the AC control in the dash board, runs through the stock ECU. I no longer have the stock computer, and have gone to a MoTeC M2R. So with out that connection, the AC compressor will not turn on using the AC button on the dash. Thanks to Rob XX 7 on the Rx7club.com, I know which wires need to be jumped to allow the AC button to make a complete circuit.

This was done on a 1987 Mazda RX-7 Turbo II:
Pull back the carpet in front of the passenger seat. This harness is the one needed to work with. If you click on the picture, you can see a larger view. It splits off the large harness running across the back of the wall and has a yellow clip.


Locate the BLUE and ORANGE wire. It is the third wire from the end of the clip. See Below. This is one of the wires you need to jump, so go ahead and slip your jumper wire in the front of that slot.

Turn the clip over and locate the BLUE and WHITE wire. This is also the third wire from the end. The two wires are right on top of one another. Slip the other end of the jumper wire in this slot as well.

Here is my el-Cheap0 AC jumper solution.
Not show in this picture,but I soldered the two connections and used electrical tape to protect the wire.
Now when I push the AC button, the orange light above the button lights up. Now all I need is Freon!! :(

Aug 3, 2009

Wastegate and AI

I just wanted to post the pic of what was happening with the Wastegate. One night, while boosting, It seemed like the wastegate wasn't opening. We took it apart to see a little corrosion inside. Not much, as you can see. But apparently some of the methanol has left traces here. I wonder if that little bit could cause the wastegate to stick....? It seems unlikely, but after cleaning it off, the problem stopped....???

Old vs New

That little nub there is supposed to be the pivot ball!! HAHA!

I busted the clip on the clutch fork and the clips in the pilot bearing.
This explains some of the issues I was having shifting. After I replaced all the clutch hydraulics, the car shifted really smooth for about a week. Then the symptoms came back. It was getting a little old. So we dropped the tranny and found all these pieces, in pieces.
Here are the symptoms I was having:
•different resistance on the clutch pedal every time I got in the car
•trouble getting in gear
•trouble getting out of gear
•car would move forward while trying to get in gear (with clutch down)
•reverse? not a chance
After installing the new parts, we adjusted the clutch pedal as well. Now the car shifts smoother than it EVER has... And it should. Everything but the actual transmission is brand new.

Jul 3, 2009

Interior: The Anti-Clutter

I really like how well the interior is coming along. It looks VERY stock, with a couple aftermarket touches. I am trying to keep it simple and uncluttered. Eventually, the Turbo Timer will go in the glove box with the boost controller.

I do have the warning surround, but I took it off so I could re-do the AFR gauge installation. V1 was ok, but there are some little things that could look better. V2 Coming Soon!


Jun 30, 2009

Hot Day In the Desert

Here are some pics from Thunderbird Park in Glendale. Some of these pics really show the holograms in my paint, maybe that will be enough motivation for me to buff that crap out!
It was pretty hot out, but I think the shoot went well.


Sneaky Gauge

I got this Blitz Temp gauge to keep an eye on AITs, but it seems like the temp range is a little off. You can kinda keep an eye on the AITs. but I think I'll switch the probe over to the oil filter pedestal and try to find a gauge with a smaller range for AITs. I'll have to mount it a little better, but this is ok for now.


This sure is a sexy gauge, I almost hate to hide it in the glove box. It really doesn't match the rest of the gauges, and I hate to clutter the interior with more gauges.

Jun 29, 2009

I'm Black

Here are the grey T2 seats I've been using for a while. They are decent enough, but don't match the black interior.


I grabbed these black clothe seats from Subu9lulu recently. He is in FL and I'm in AZ, so we had to work out a shipping arrangement. We did some shopping and found Greyhound to be the cheapest. $80 from Orlando to Phoenix. Got them in a week, and they look great!


Half-way done and you can see how much better the black seats look!

Finally, my grey-to-black interior swap is DONE!

Jun 15, 2009

Interior Almost Complete

I got my car back from the shop on Friday morning. She got a new water pump and all new clutch hydraulics. The car is running smooth as can be. It is so much more enjoyable when shifting is effortless!!

I was happy to get her back, so I gave her a quick cleaning and started painting and installing some interior parts I've been meaning to get done.

Here is a
BEFORE on the ash tray... gross.


I used Krylon satin paint. It's a pretty close match, but I may try again with Semi-Flat black instead. Either way, it looks MUCH better
AFTER.


I had some grey vent lating around in perfect shape. So they got a coat of paint too.


This piece never came on a S4, but the S5 carpet had a hole pre-cut for it. I had to drill a couple holes into the side of the car to get this shelf piece to mount in the S4. It wasn't rocket science, but it definitely helps the interior look more complete and natural. The light isn't functional yet, but there are some wires from the old speaker amps I think I can use.


I don't have this piece anywhere, but a local guy said he has it and is going to hook me up this week.


The rear cargo cover was missing the little mounting rod on one side, so my cover never really closed properly, and was sagging in the middle. I went to HD and got an aluminum 3/8" rod, cut it, drilled a couple hole in each end, and mounted it all the way across the cover. Now it has support on both sides and a little more stiffness in the center. I painted it black too...


All I need to completely complete my interior is:
the passenger A-trim piece
the ledge in the rear passenger side
Black seats
Defrost vents
Side view mirror switch